Chain Link Fence Installation Diagram
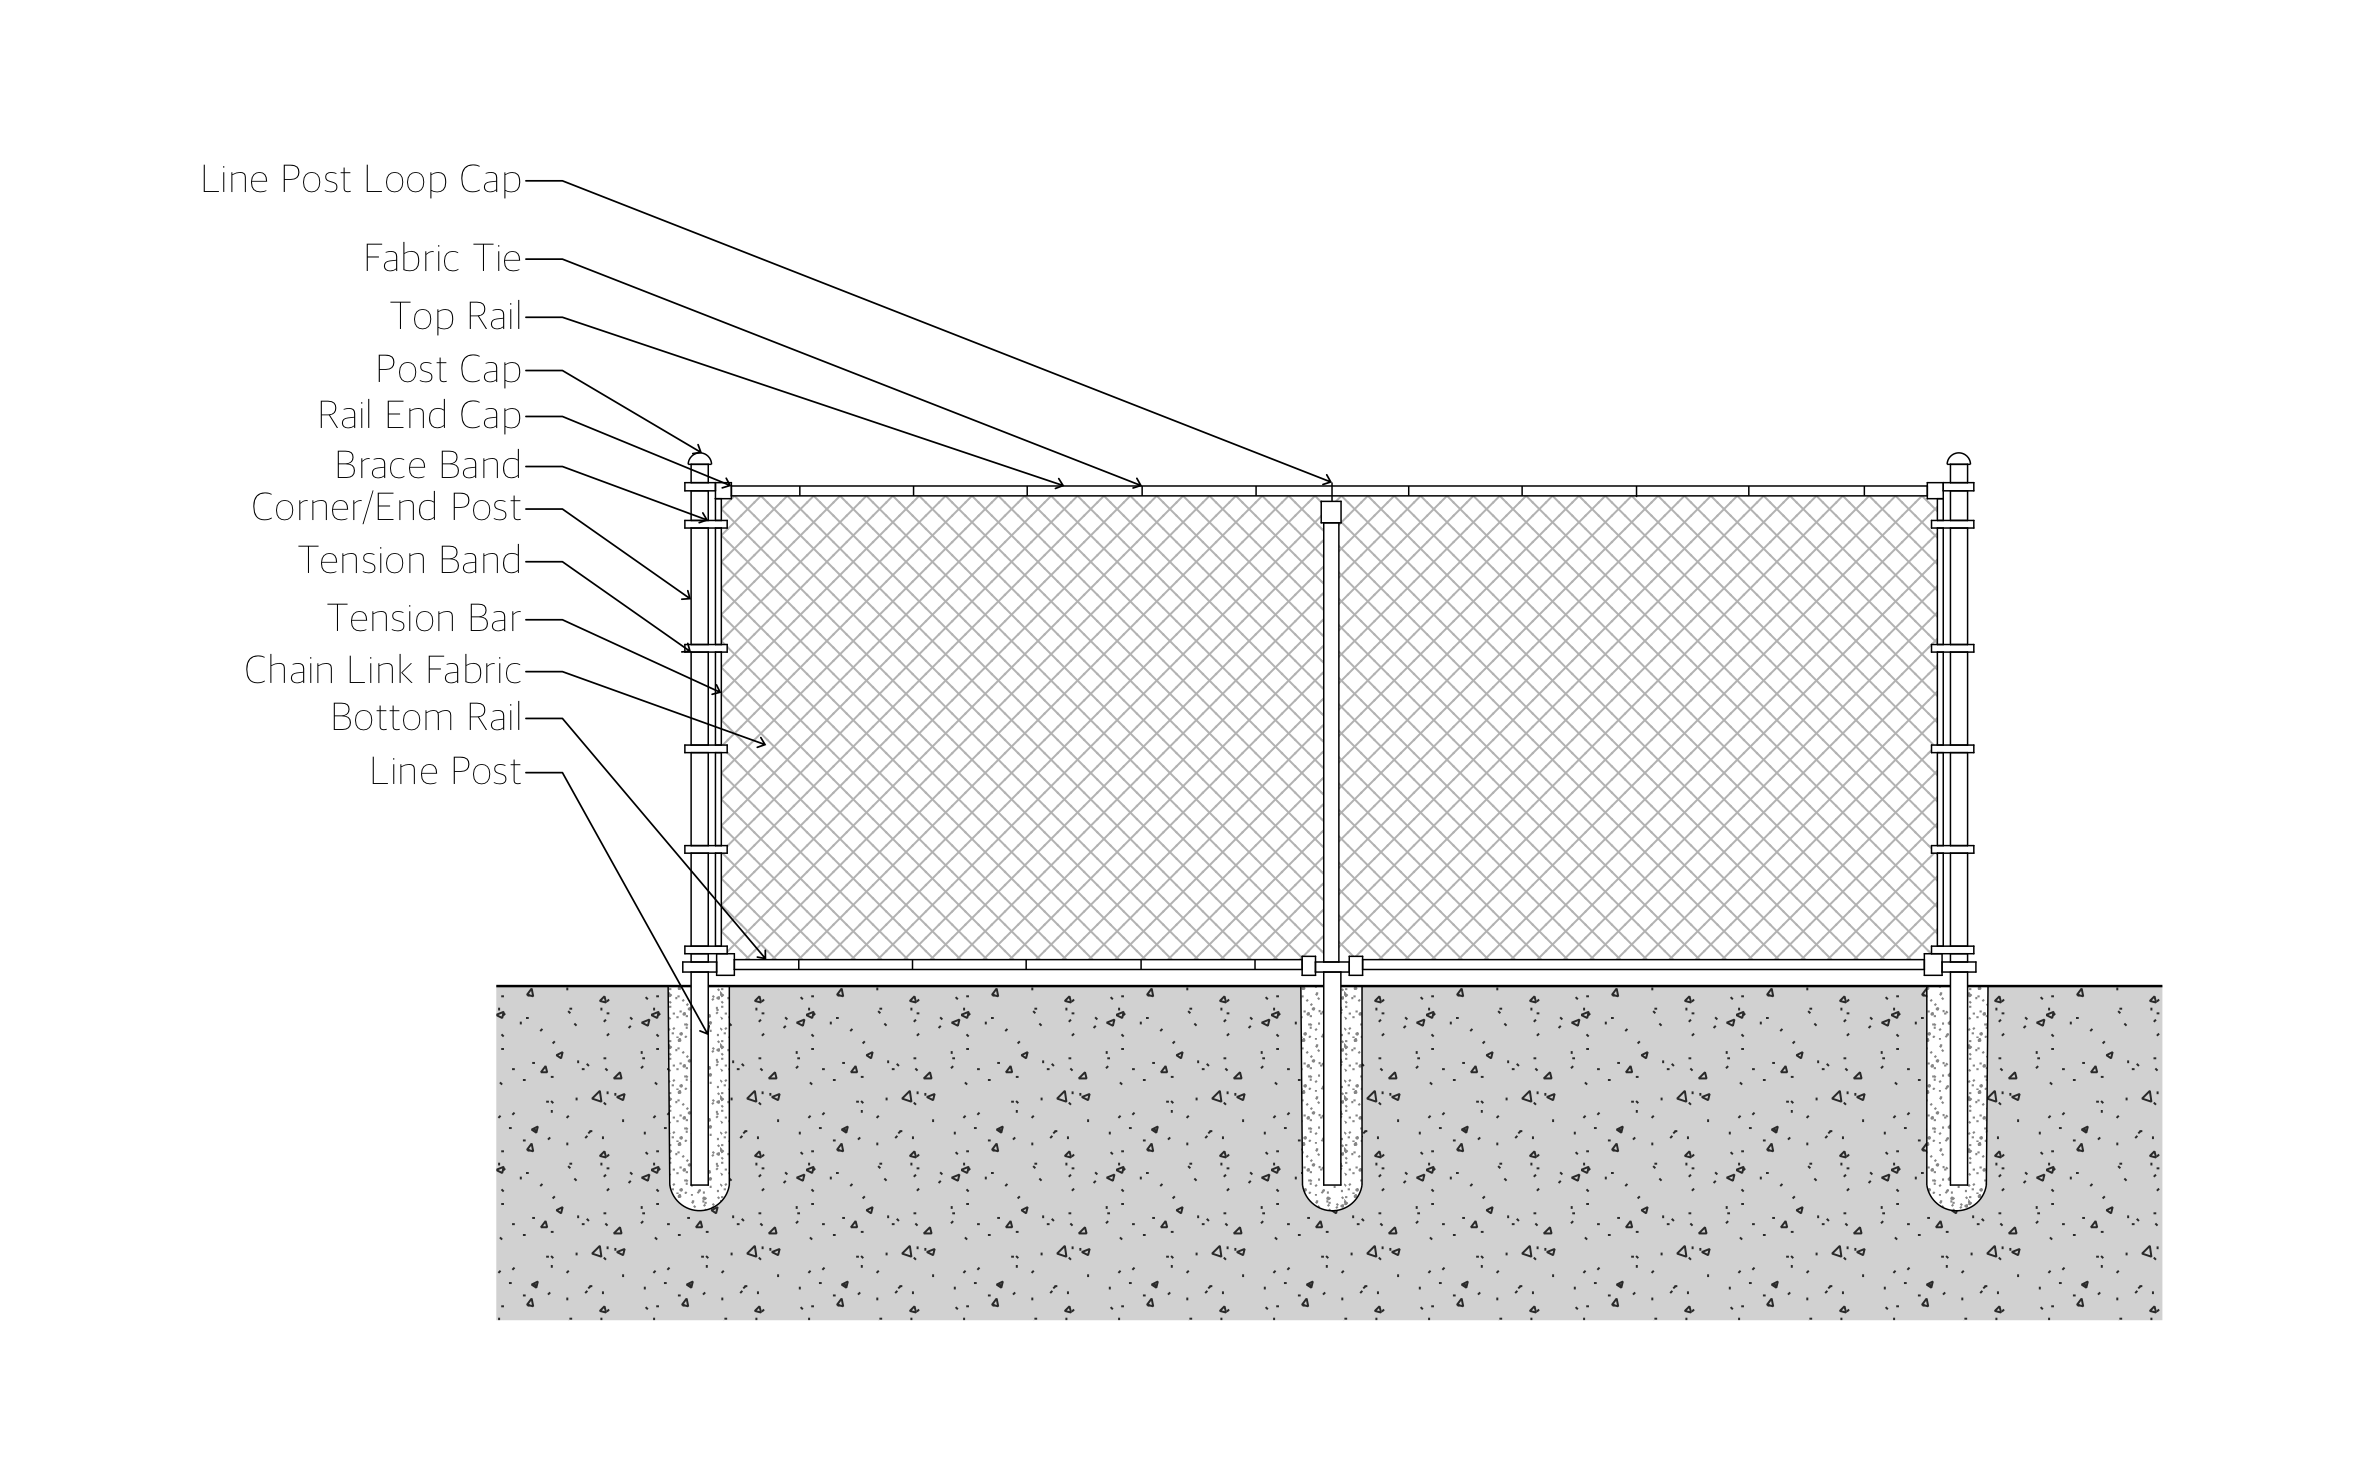
A chain link fence secures a yard, a dog run, or a commercial lot at a price most other fences can't match. ArcSite's chain link fence installation diagram names every fitting, so your crew and your customer use the same words.




Free access to over 1,200 shapes and blocks included with the ArcSite CAD app
Key Features
This chain link fence installation diagram includes:
- Corner/end posts and a line post
- Posts set in concrete footings
- Top rail and bottom rail
- Chain link fabric held by fabric ties
- Tension bands and tension bar
- Brace bands and rail end caps
- Post caps and a line post loop cap
The diagram separates terminal fittings (tension bands, brace bands, and rail end caps) from line post fittings (loop cap and fabric ties), a split worth getting right when you count fittings for an order.
Trusted by the Pros. Honored for Innovation.





Key Considerations When Installing a Chain Link Fence
Terminal posts carry the fabric tension on a chain link fence, so they get the tension bands, brace bands, and end caps the line posts don't. This ArcSite diagram labels every fitting on both post types, so you can count what each corner and run needs.

Landscaping & Outdoor Living
templates you might like
FAQ
No. It labels each part and shows the posts set in concrete, but not exact spacing or depth. Use local code and your soil conditions to set both.
Yes! You can add a gate opening and gate posts in ArcSite wherever the run needs one.
Sure. Save your edited version as a template in ArcSite and open it whenever a new chain link bid comes in.