Site Plan Examples to Get Started Creating Your Own



Curious what a site plan is? You're not alone. If you're new to construction or DIY projects, you're probably needing to create one for the first time.
At its core, a site plan is a 2D drawing of a property. It shows structures, driveways, landscaping, and utilities all in relation to the land and its surroundings. It’s the first step in planning any construction project, whether you're adding a fence, garage, or an entire building
But site plans aren’t one-size-fits-all. They can be as simple as a hand-drawn sketch or as complex as a digitally rendered blueprint. In this guide, we’ll walk through different examples of site plans, from rough sketched layouts to high-precision CAD drawings, so you can get a clear picture of what works best for your project.
What is a Site Plan?
A site plan is a scaled drawing that shows the layout of a property. Unlike a floor plan, which focuses on interior spaces, a site plan looks at the entire property from above. In other words, that’s what you would see if you flew the drone above the area, in a 2D view. Many key elements go into a site plan, so it's best to look at real-world examples used in real cities to see how they are drawn and labeled.
Site Plan vs. Floor Plan: What’s the Difference?
Key Elements of a Site Plan
A well-made site plan typically includes:
✅ Property boundaries – These define the limits of the land.
✅ Buildings & structures – Like houses, garages, sheds, decks, etc.
✅ Driveways & walkways – to show vehicle and pedestrian access points.
✅ Landscaping – such as trees, gardens, lawns, and green spaces.
✅ Utilities – like water, sewage, electricity, and drainage.
✅ Setbacks & zoning info – this ensures compliance with local regulations.
✅ Topography – like elevation changes, slopes, and grading (if relevant).
How Site Plans Have Evolved (With Examples)
Site plans have been around for centuries, but how they’re created has drastically changed. Let’s look at some real examples, starting from the simplest hand-drawn sketches to modern CAD designs
1. Hand-Drawn Site Plan Example

Before computers, architects and builders sketched site plans by hand. These weren’t always perfect, but they served their purpose.
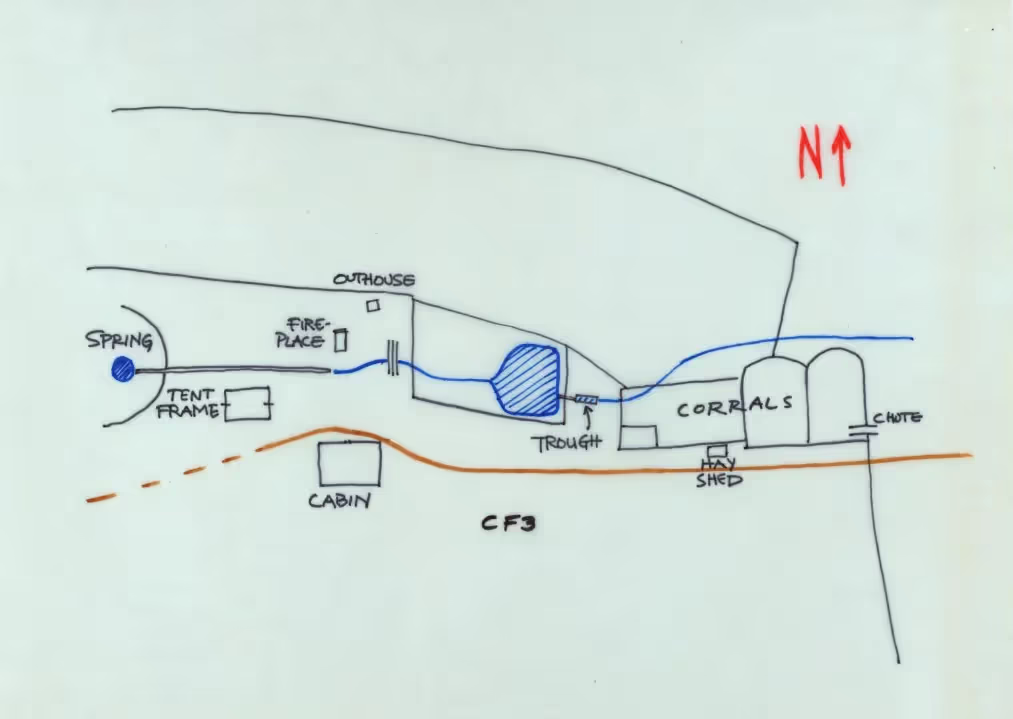
Take the 1982 site plan of Ninety-Six Ranch, a hand-drawn map showing the layout of buildings, fencing, and land use on the property. This kind of drawing was common for rural projects where function mattered more than precision. But in 2026, it's probably not accurate enough for your needs. Not to mention, it'll take you a long time to manually draw out everything to scale (if you even have the drawing abilities).
🖊 Key Takeaways from Hand-Drawn Site Plans:
- Simple and quick for small projects like sheds or fences.
- Not always to scale, so less precise.
- Still used today for concept sketches before making a digital version.
2. 2D CAD Site Plan Example
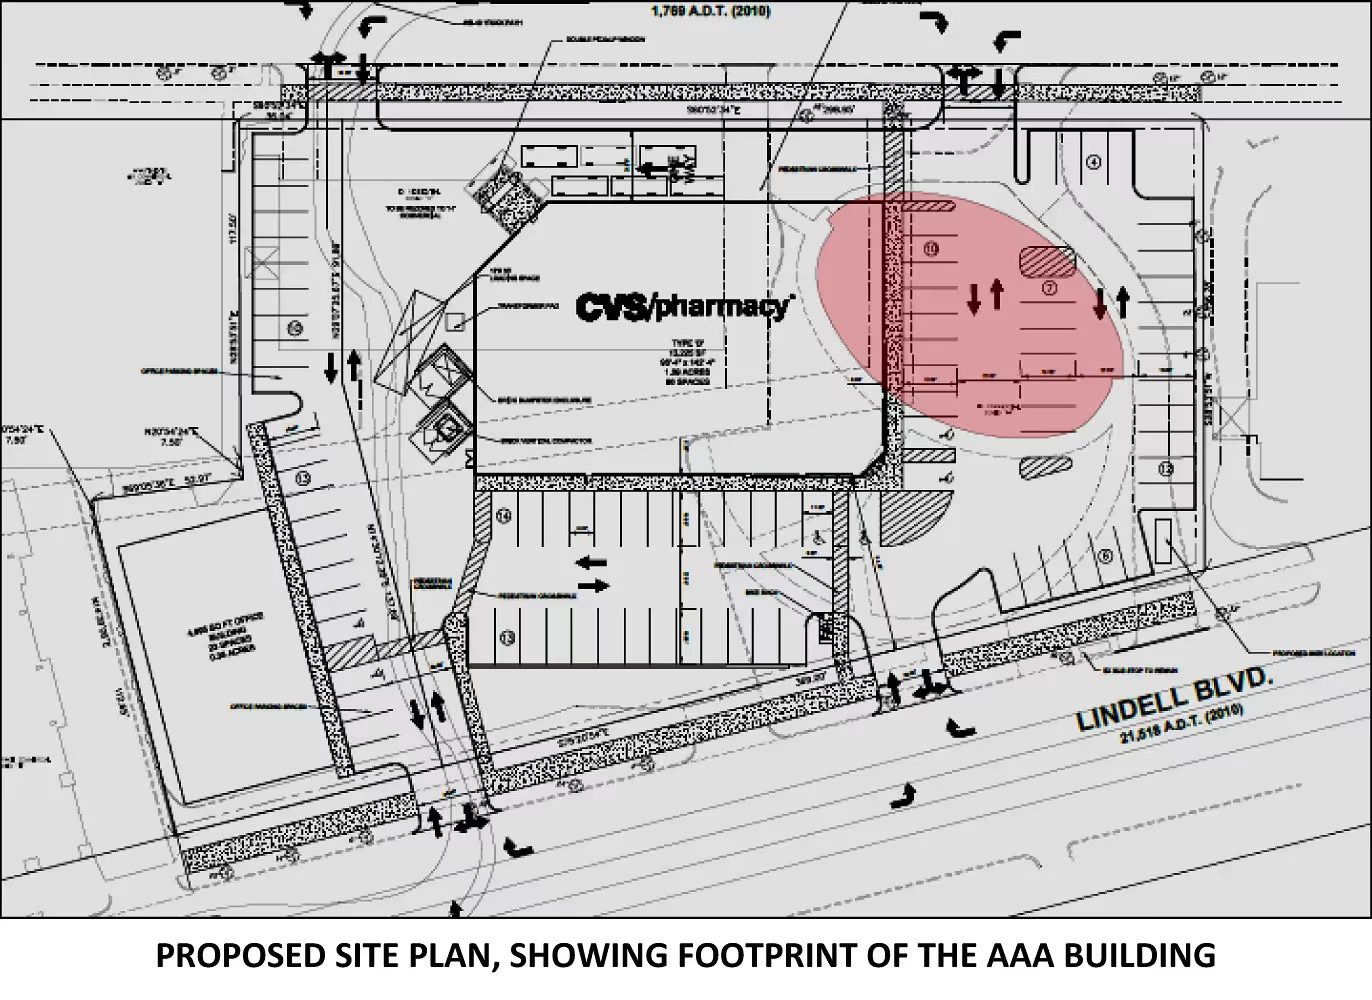
Computer-aided design (CAD) software came onto the scene in the late 1950s. With this new computer-aided capability, site plans became more detailed and accurate. You can draw your 2D digital plans with precise measurements, scale them as needed, and revise them as many times as you want with ease. However, these tools had a learning curve. The software was complex, and was adopted across a wide range of industries like construction, design, architecture, and engineering.
If you're designing a 2D site plan for a new house, it might show:
✔️ The house footprint (outline of the building).
✔️ Exact property line measurements.
✔️ A driveway layout with parking spaces.
✔️ Drainage plans to prevent water runoff issues.
✔️ Required setbacks from the property line.
📏 Why create a digital 2 site plan?
- More precise than hand drawings.
- Required for most permit approvals.
- Easily editable - change one element without redrawing everything.
3. How do Governments & Municipalities Use Plans?
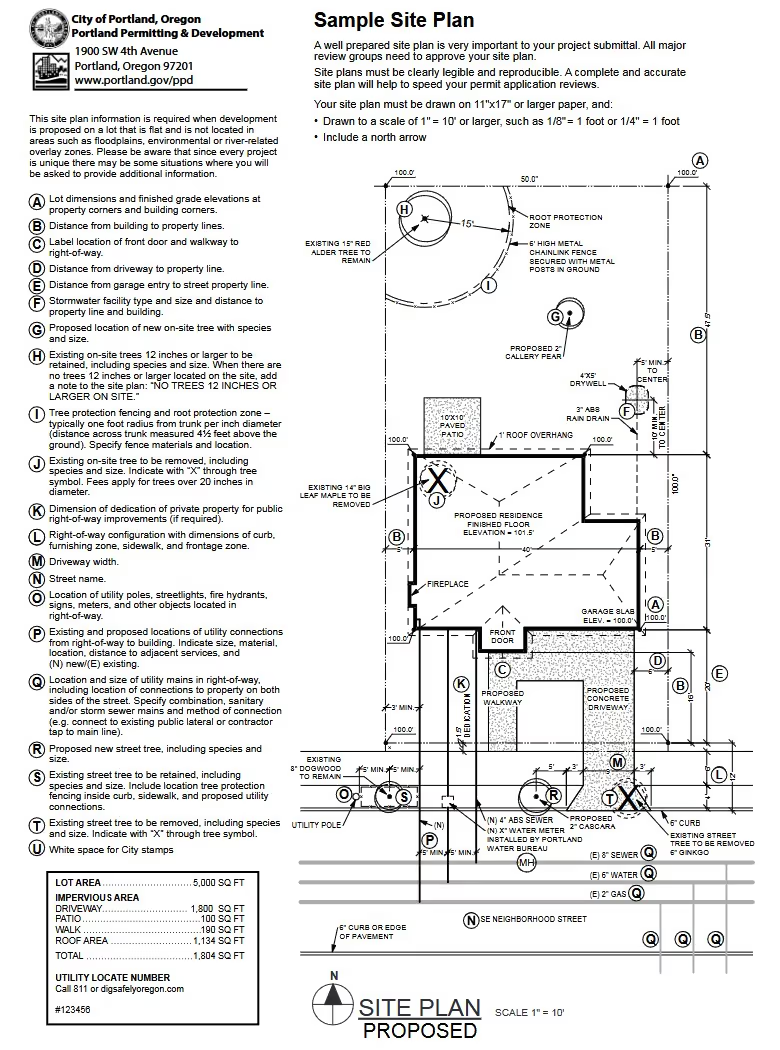
Today, most cities provide site plan templates with specific guidelines. If you're submitting a site plan for permit approval, it needs to match local requirements.
For example, Portland’s site plan guidelines include:
📌 Property boundaries labeled with exact dimensions.
📌 North arrow & scale for proper orientation.
📌 Existing & proposed structures, clearly marked.
📌 Driveways, walkways, and utility hookups detailed.
📌 Zoning information & setback requirements included.
If you've never done this before, this can seem daunting. But it shouldn’t be. Because CAD technology has evolved since the late 1950s, and you no longer need expertise in CAD to create a site plan. It’s safe to say that drawing a detailed, professional site plan has never been easier than it has in 2026. Here’s how.
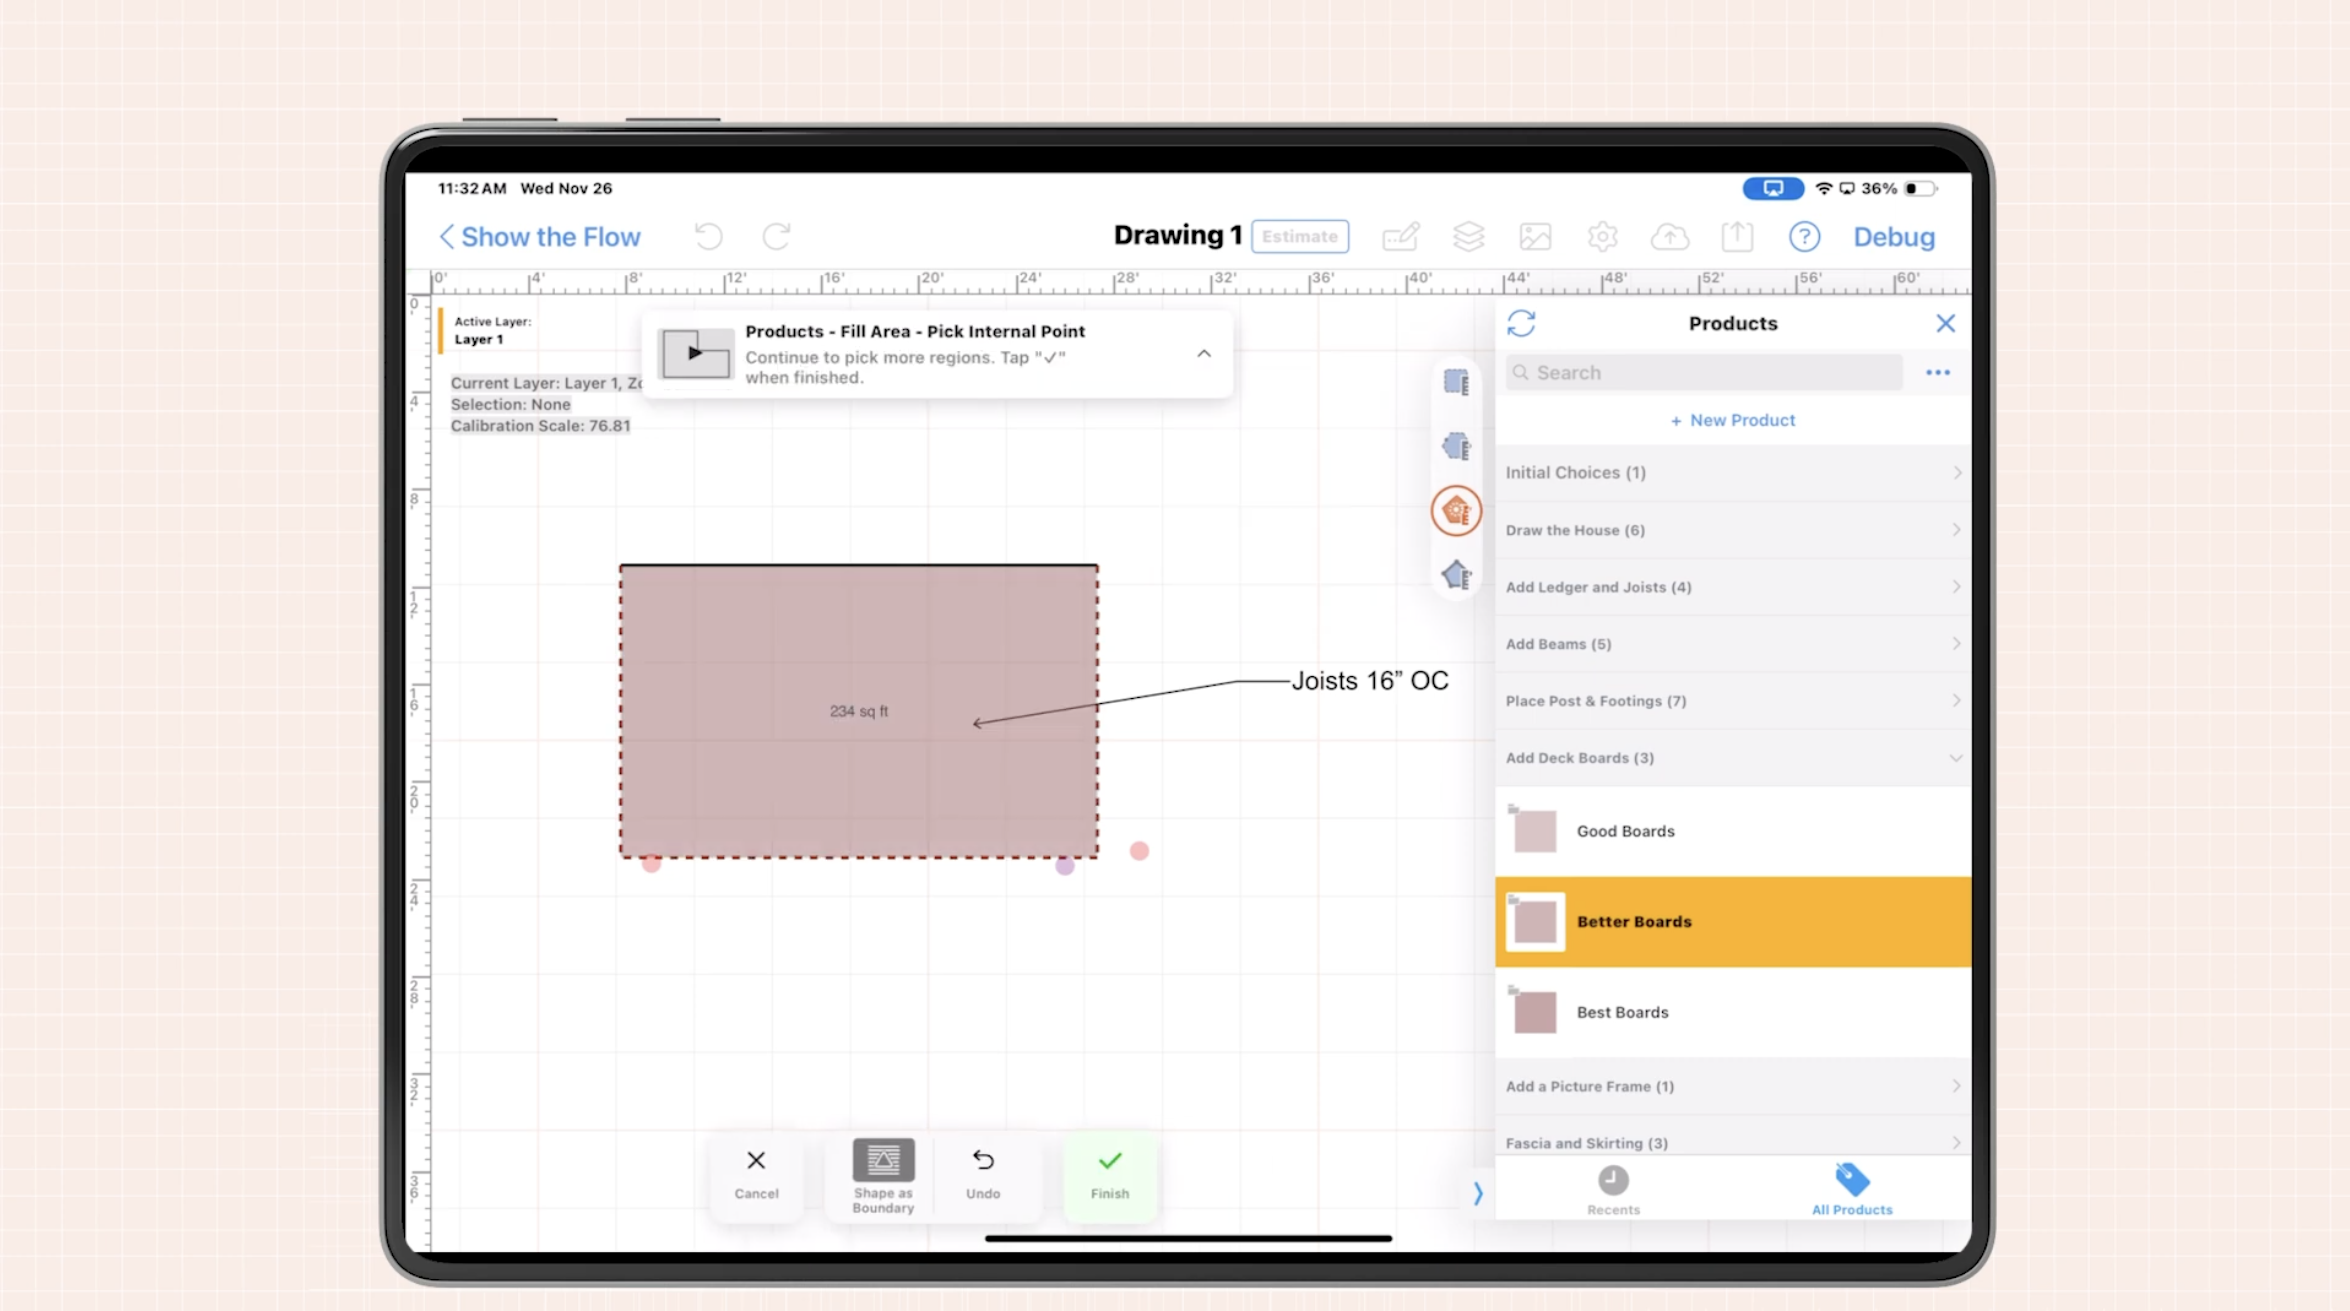
4. Make It All Easy With ArcSite App
If drawing by hand sounds frustrating, there’s a better way. ArcSite makes it simple to create accurate, professional site plans without needing CAD experience. It was created by one of the engineers working on Autodesk's AutoCAD, so it's made with ease of use in mind. Here are some of the ways it makes it easy to get started:
✅ Drag-and-drop drawing tools – no sketching skills required
✅ Pre-built templates – so you don't have to start from scratch.
✅ Cloud storage – Access your site plans anywhere.
✅ Works on mobile & tablet – draw with your finger like it's a piece of digital graph paper
ArcSite combines the best of both worlds - ease of use for beginners, but enough depth for users who want to learn more. It's also specifically built for specialty contractors who need to create specific objects on their drawings.
Creating Site Plans In ArcSite in 6 Easy Steps
Drawing a plan in ArcSite is a straightforward process. Here's a step-by-step guide to help you get started.
Jump over to our Everything You Need to Know About Site Plans article to watch a video demo on creating site plans.
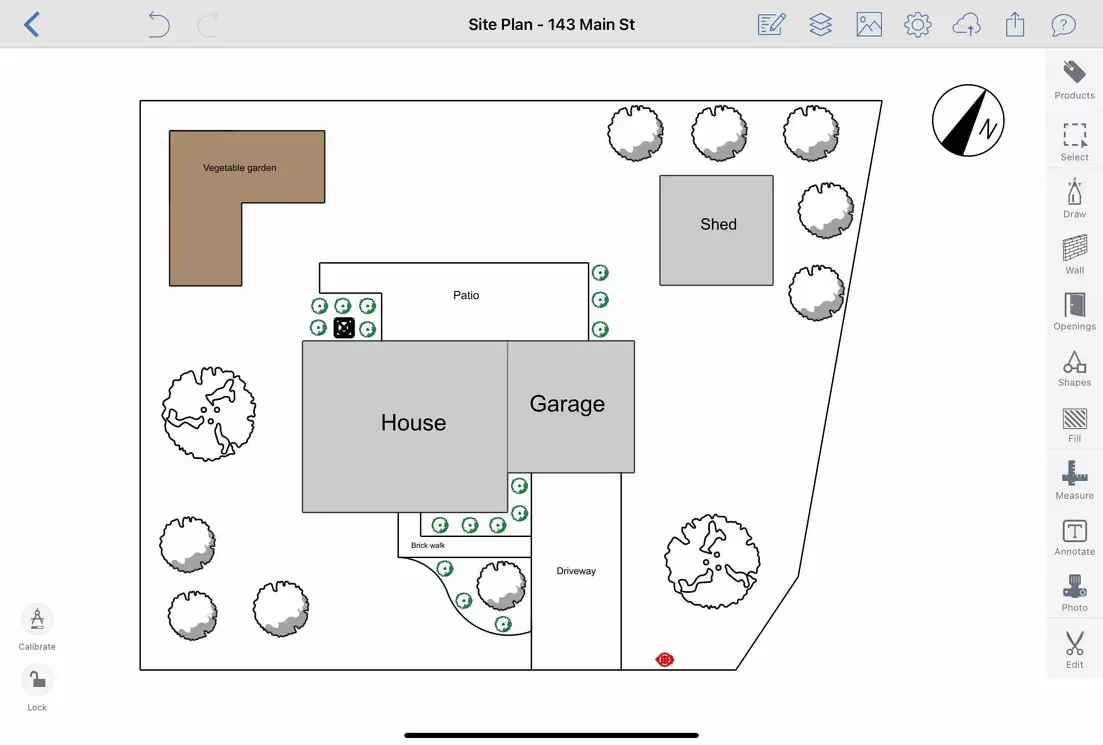
First of all, download and install ArcSite on your preferred device. It's available for iOS, Android, and Windows platforms; you can work on a tablet or even your phone. Once you have it installed, open the ArcSite app and create a new project in six simple steps.
Step 1: Set your drawing scale to match your project's requirements
Your drawing should contain five key elements:
1️⃣ Property boundary lines (to scale).
2️⃣ Building footprints (house, garage, etc.).
3️⃣ Driveways, walkways & landscaping.
4️⃣ Utilities & drainage (if required).
5️⃣ Labels & dimensions for clarity.
Step 2: Draw Basic Shapes
- Use the 'Draw' tool to sketch the outlines of your site, e.g., property boundaries and building footprints. You can draw freehand or use straight lines for precision.
- You can select any drawn element to move, resize, or rotate as needed. There are also a variety of editing tools to adjust every detail for accuracy.
Step 3: Add Measurements
- Use the “Dimensions” button. ArcSite provides tools to add precise measurements directly onto your plan. Pick a distance between two points, and the app will mark the span between them.
Step 4: Insert Reusable Shapes
- ArcSite has an extensive shape library, tailored with premade shapes so you don't have to draw from scratch. You'll find common elements like trees, utilities, or furniture to add as needed; just drag and drop. You can also create custom shapes specific to your project needs.
Step 5: Embed Photos and Markups
- Add photos taken on-site to your plan with a single click.
- Mark up these photos within ArcSite to provide additional context or notes.
Step 6: Save and Share
- Double-check for accuracy.
- Make sure your site plan meets local permit requirements.
- Submit to your city planning office if needed.
Once your site plan is complete, save your project. ArcSite app gives options to export your drawing in various formats or share it directly with clients or team members.
👉 Try ArcSite today—Schedule a Demo!
Categories
FAQs
Related posts