Water Softener Installation Diagram
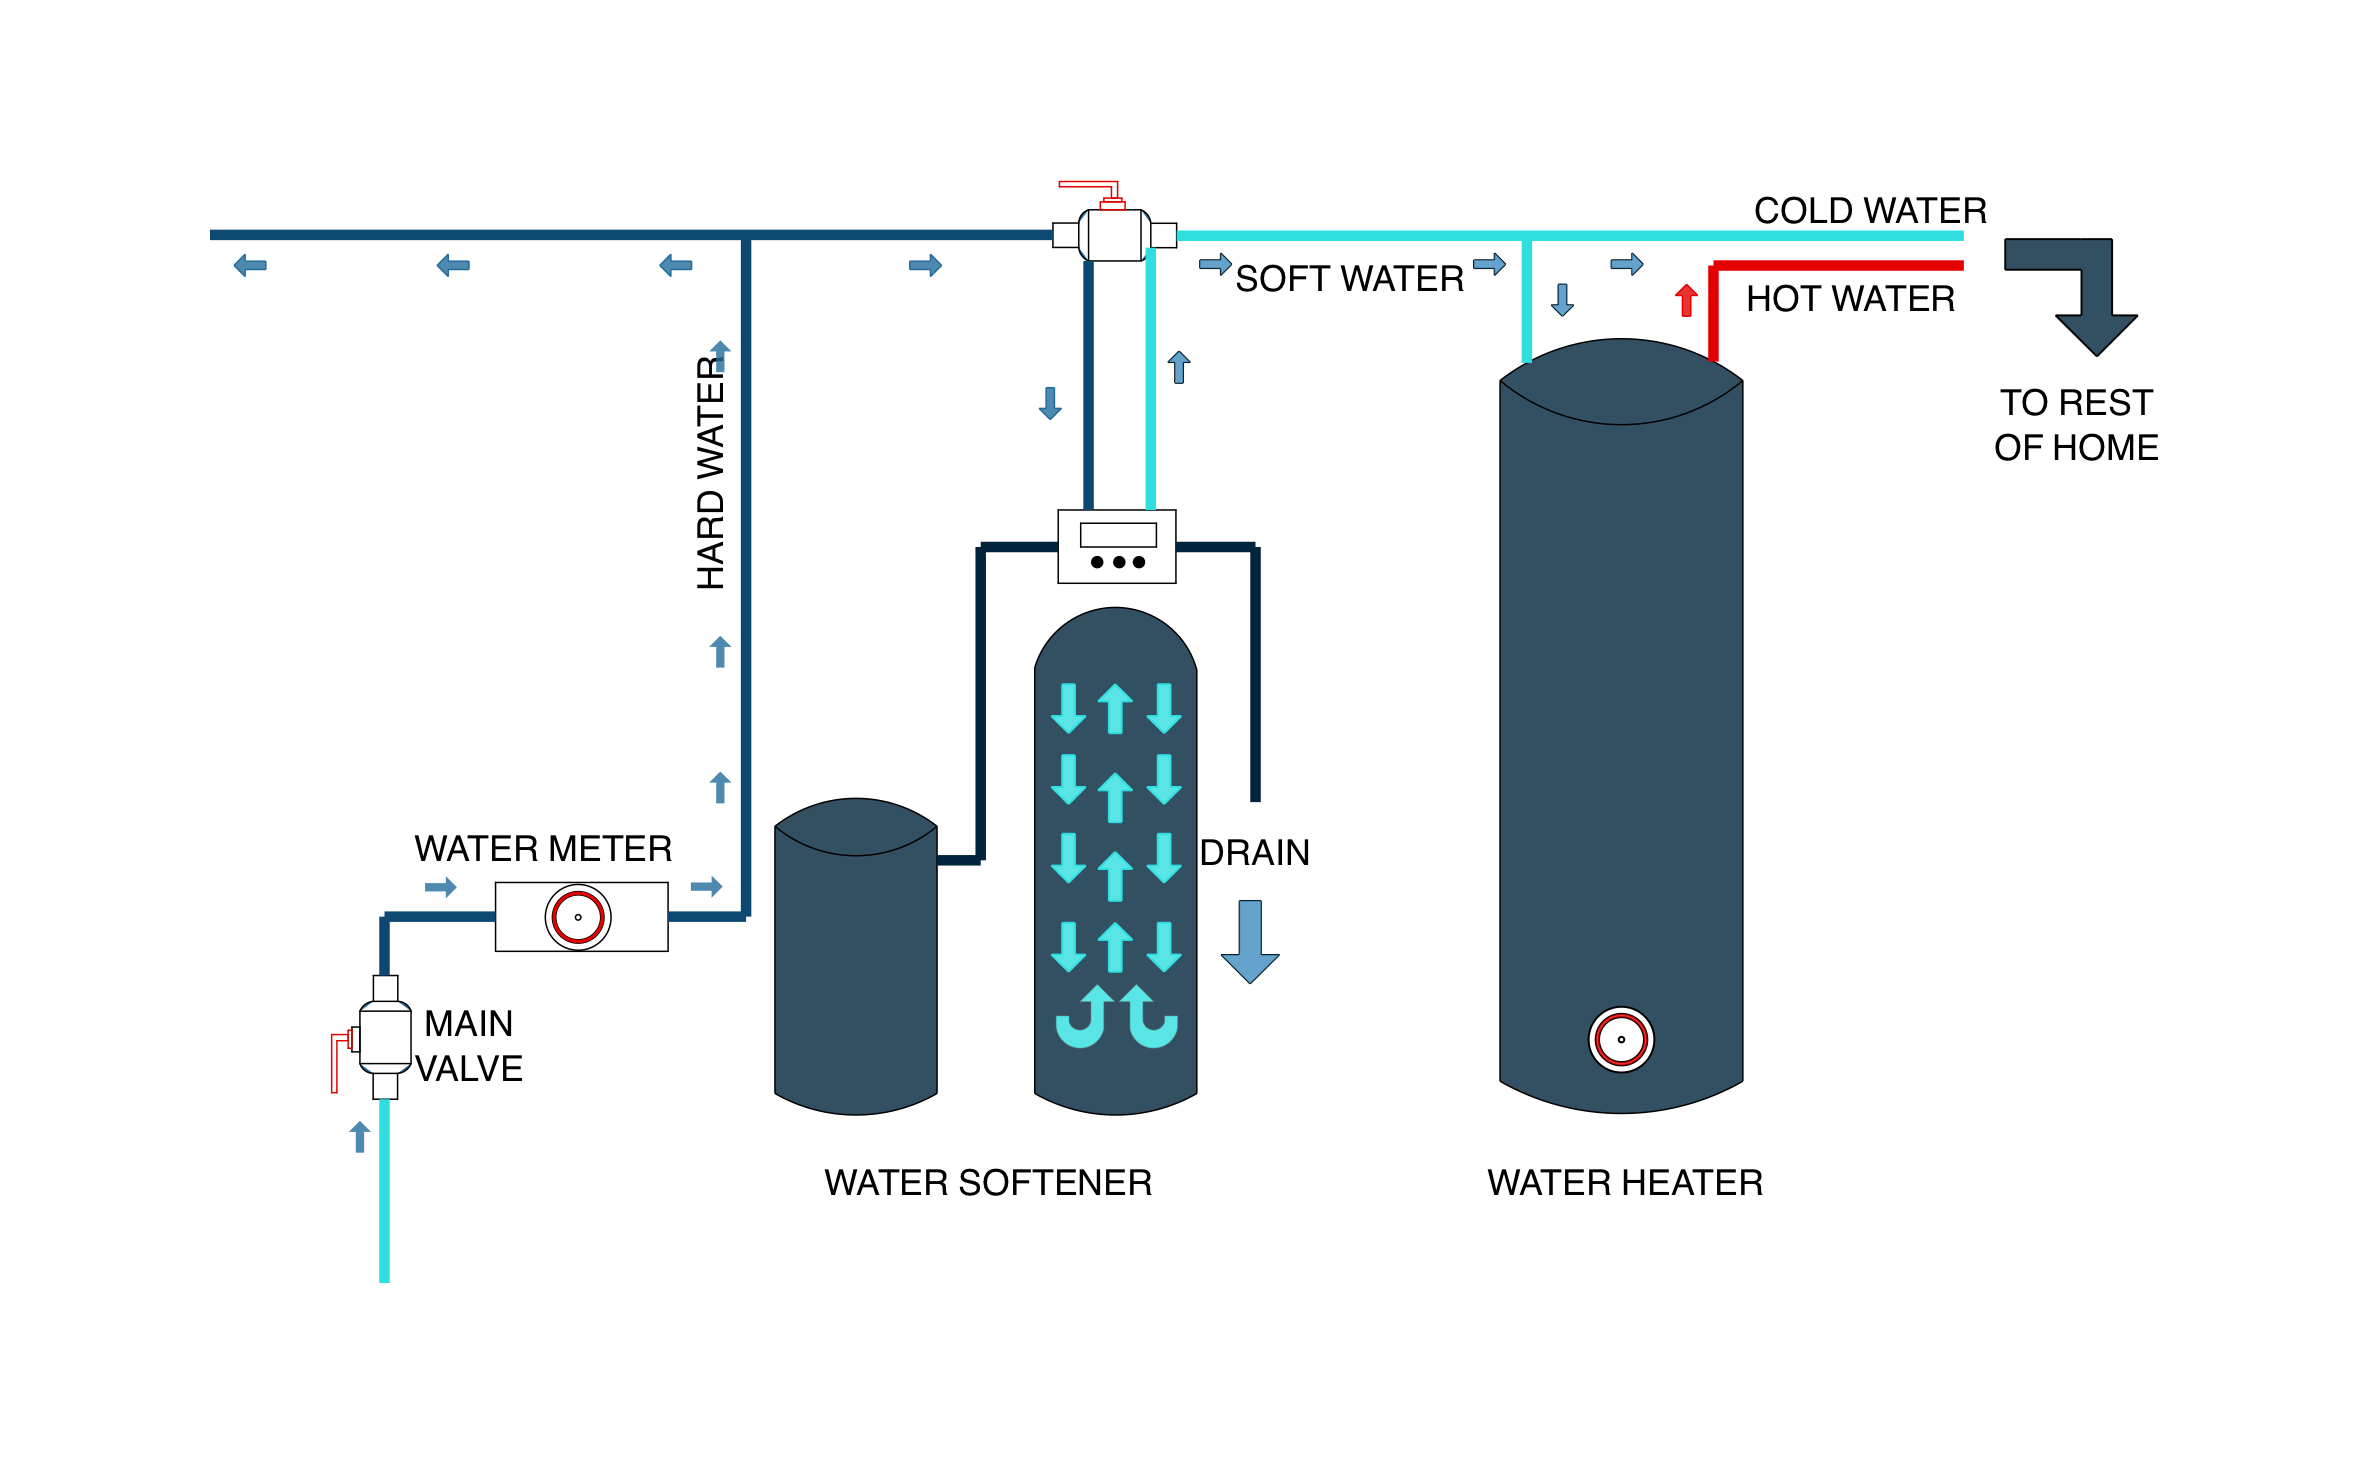
Soft water means no white crust on faucets, cleaner dishes, and a water heater that isn't fighting scale buildup. ArcSite's water softener installation diagram traces the full path from the main valve to the rest of the home.




Free access to over 1,200 shapes and blocks included with the ArcSite CAD app
Key Features
This water softener installation diagram includes:
- Main valve and water meter on the incoming line
- Hard water branch splitting off before the softener
- Brine tank and resin tank with a control head
- Shutoff valve on the line feeding the softener
- Drain line for the softener's regeneration cycle
- Soft water feeding the water heater and cold lines
- Color-coded hard, soft, and hot water lines
The hard water branch splits off before the softener, so outdoor lines skip treatment and you don't spend salt softening water for the lawn.
Trusted by the Pros. Honored for Innovation.





Key Considerations When Installing a Water Softener
Where you tap into the main line decides which fixtures get soft water and which don't. With ArcSite, you can redraw this diagram around your customer's actual plumbing and show them exactly where the softener lands.

Plumbing & Restroom Fixtures
templates you might like


FAQ
It shows a hard water branch splitting off before the softener. That's the line you'd typically route to hose bibs and irrigation.
Yes! You can drop a sediment filter or any other component into the line in ArcSite and redraw the piping around it.
Yes. ArcSite can turn the parts on your drawing into a priced proposal, so the customer gets the layout and the cost in one document.